This post was originally published on DIY Network’s blog Made + Remade in August 2012.
Believe it or not, it’s been a quick 6-months since we finished our big bathroom renovation. Good news: We still love it (especially when we go down memory lane and recall how gross the bathroom was before we took the DIY plunge). The bad news? One particular unfinished detail has been dragging the room down.
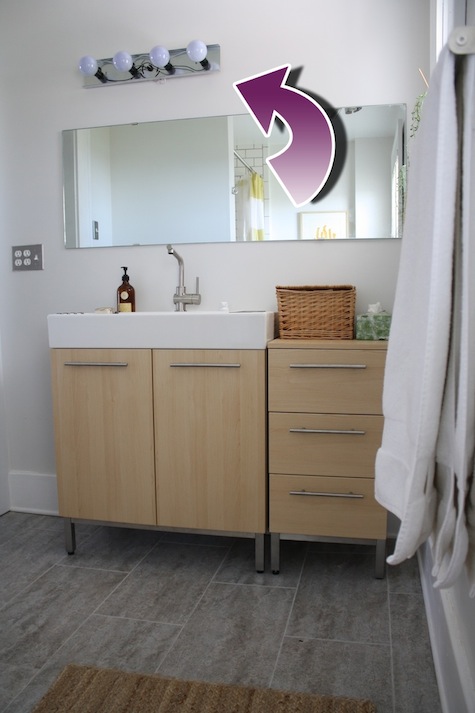
Allow me to point out a few things:
- That old light? It’s not on center above the sink.
- In fact, it wasn’t centered above the old sink either, fancy that.
- Why did I ever even like it? Well, besides putting out lots of light for my morning routine, it was also only $2 (brand new but on super-clearance), and it’s hard to beat that.
- After we finished the bathroom, I didn’t even put its faceplate back on it because we never thought it would take so long to choose a replacement fixture. (Note: There weren’t exposed wires ends since they were all tucked behind the fixture in the box, but for safety’s sake, know that it was far out of reach of child fingers, and high enough for it not to be a distraction or danger to curious adults too.)
West Elm’s admittedly one of my favorite sources, and that fact, mired with the detail that I have a specific distaste to almost all manufactured over-the-sink sink lights, I married myself to the Contour Double Sconce, a $79 product. The price was right, and I loved the modern powder-coated finish, but when I was putting the finishing touches on the bathroom makeover, it was back ordered. West Elm had a single sconce option too, but double wide seemed like it would work better with our wide vanity and sink, and was decidedly worth a 4-month wait.

Swapping out a light itself isn’t actually hard, but when you’re exploring the state of the electrical box and the placement of the studs behind the wall, it becomes a little more complicated and requires some exploratory cuts. Sometimes, big cuts, even bigger than what you see here, and you begin to wonder how you’ll be able to patch that without looking like a patch job.
The tutorials on DIY Network pertaining to electrical, drywall installation, and drywall patching are far more thorough than my amateur description of the process, but for the sake of demonstration, I knew had to remove the electrical box, and reinstall it 5 inches to the right so that it was centered over the sink. There had to be enough room in the wall to get a hammer (awkwardly) and it had to be installed on a stud; fortunately, there was a cross brace between studs (I’m pointing to it in the next picture) which made it a little easier. There was no rewiring to the switch, because thankfully whoever installed it left enough extra wiring length in the wall.

After a few days repairing what I destroyed, crossing my fingers the while while that there wouldn’t be visible evidence of the drywall surgical procedure, I was able to stand back and adore the brand new long-awaited sconce. The vanity and light aren’t tilty, just my camera in a moment of sheer excitement.

There’s one other thing that you may have noticed:
The mirror. I had it cut smaller. It’s not that we didn’t love having a gigantic mirror (it certainly made getting ready in the morning easy), but with the new centered light, it felt worth exploring bringing the mirror down to width with the sink top itself (a clean 32″). I think it looks a lot better, more in proportion with the other features of the room, and still generously wide so that two people can watch themselves brush their teeth simultaneously.

The room looks pretty from the entryway too. The profile of the light is beautiful, and the mirror still reflects a generous amount of light in the room.

If you’d like to learn more about the rest of this bathroom remodel, check here:
Day 3: Building custom shower shelves, moisture barriers, and cement board
Day 4: Replacing the shower valve and finishing the cement board
Days 5, 6, 7, 8: A 4-day tiling marathon
Day 12: Floor and door trim, beginning to end.
Day 13: Hacking the vanity and hooking up the sink
Day 14: Installing a big mirror
Day 15, 16: Awesome window trim
Day 17: Painting trim, and installing a classy marble threshold


Comment
Everything should start with a plan. You have to know what you want to have for your bathroom. Design or visualize what it will look like after the renovation. And that will surely make your project successful.