This post was originally published on DIY Network’s blog Made + Remade in April 2014.
I’ve been wanting to experiment with making my own wood block stamps, and what better an application than a new set of springtime cloth napkins for dinners on the patio?
Printmaking is an art that I’d love to explore more, so this was a nice test run that helped me get a better understanding of how to make wooden stamps, and how to get comfortable using the tools involved.

If you’re interested in either DIY napkin designs or, like me, enjoy creative ways to use routers for creative tasks like block printing, keep on reading. This project will be right up your alley.
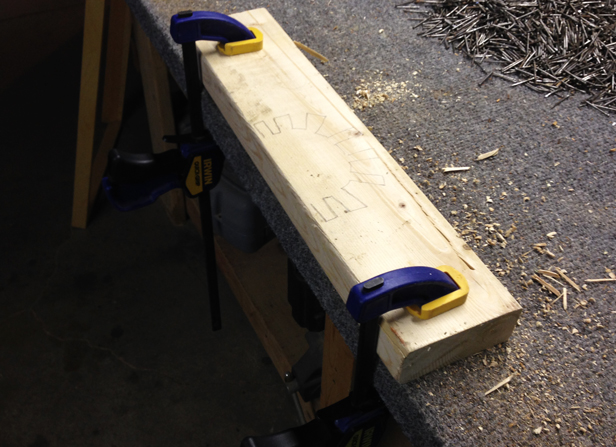
Step 1
Draw your design onto a piece of 2×4 scrap lumber that is at least 12″ in length. Attach the board with clamps to your work surface with enough room to maneuver the router comfortably in between the clamps. Draw your desired design using a pencil, making note of the areas from which you will want to carve away.
Step 2
Set your straight router bit so that it is exposed by 1/2″. This means that when the router is in operation, it will carve negative space that is 1/2″ deep into your block.

Step 3
Allowing the router bit to do the carving, carefully maneuver the tool around your design and clear away the negative space on your stamp. If you are going to create negative space that cannot be reached from the edge of your board, bore a pilot hole using a drill and bit, drop the router bit into that hole, and turn on the router to carve away surrounding material.
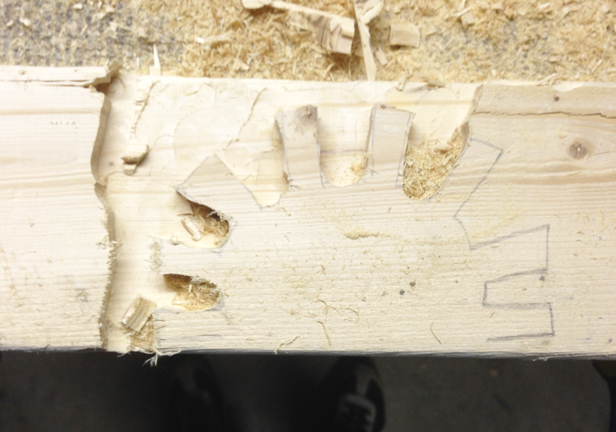
Step 4
Continue until your stamp design is fully revealed! Sun shiny-shine.

Step 5
Use sand paper to eliminate any rough edges and splinters from the finished design.

Step 6
Using the chop saw, remove excess material from your finished block.

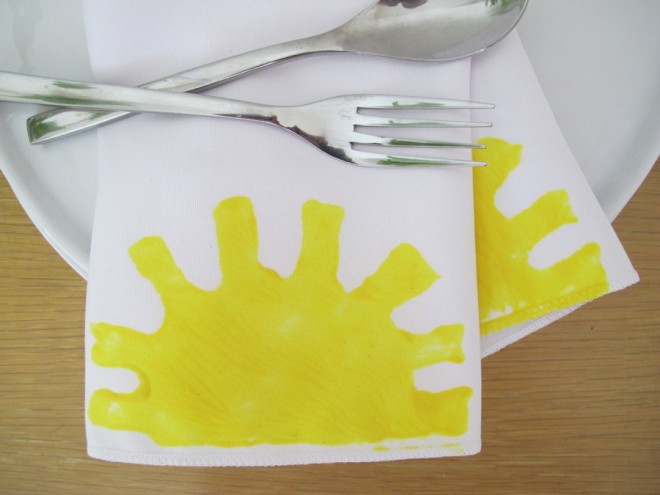
Step 7
Prepare your block for printmaking by coating the raised area with fabric paint (the kind that won’t wash clean in the laundry). I used a paint brush to apply a thick coat of paint evenly to the stamp, rather than dip the wood into a tray of paint. It was just a little neater and more consistent this way.

Step 8
Apply the block firmly to your napkin, and remove for a crisp imprint of your design.
Step 9
Allow the paint to dry, launder once, and get ready to serve!


Leave A Reply