It’s more than kind of a shame that my necklaces have been stored in a tangled knot since the summer when I removed the hooks that they were organized on in the office. How they got in a knot is beyond me, it’s kind of like how when you wrap your computer power cord up in a perfectly wound tight little loop and then when you pull it out of your purse or tote (or man bag) it’s morphed itself into an unusable non-cord of 10 complex knots.
The office used to be my walk-in-closet, so it might seem weird that I had lots of jewelry hung in there, but it was fully appropriate for those few years. Kept things neat and tidy. And it was a constant reminder to ornament my neck and accessorize my fancy self. (That was a joke, I’m really not fancy, but I do like a long swaying necklace from time-to-time.)
We’ve been furiously jamming on the bathroom shower (last DIY Network update was here, BTW). And we don’t have finished photos yet, but do have lots of scrap subway tile to show for our progress. The real reveal of the shower will come on Thursday if all goes as planned, but those scraps were just asking to be used, so I did something with them. Because I can’t sit still while I’m watching TV at night.
Here’s the background:
1. I really (really, really) liked the idea of installing the tiles in the shower in a herringbone pattern, but Pete poo-poo’ed it, not wanting our first shower tiling project to be uber-complex. In hindsight, he was 100% right; it would have been damn hard trying to work around the shelves that we custom built.
2. As I meticously cut dozens of pieces of tile with our new wet saw (shown in this post for the first time), I stacked scraps aside already envisioning what I could make.
3. As I’ve already thoroughly reported, the jewelry-storage situation is a mess, and because all of the necklaces are knotted together on a shelf in the guest room, I never think to wear them, hence, I’m an un-accessorized bore-fest.
4. I try to waste nothing. Call me a hoarder, but it’s a good thing we saved the unusably tiny scrap tiles (and the scrap HardiBacker, and the scrap shiplap from previous projects).
When it came right down to it, testing my herringbone skillz didn’t have to be something very large scale and permanent (like in my entire shower), it could be something small. Something resourceful and pretty.
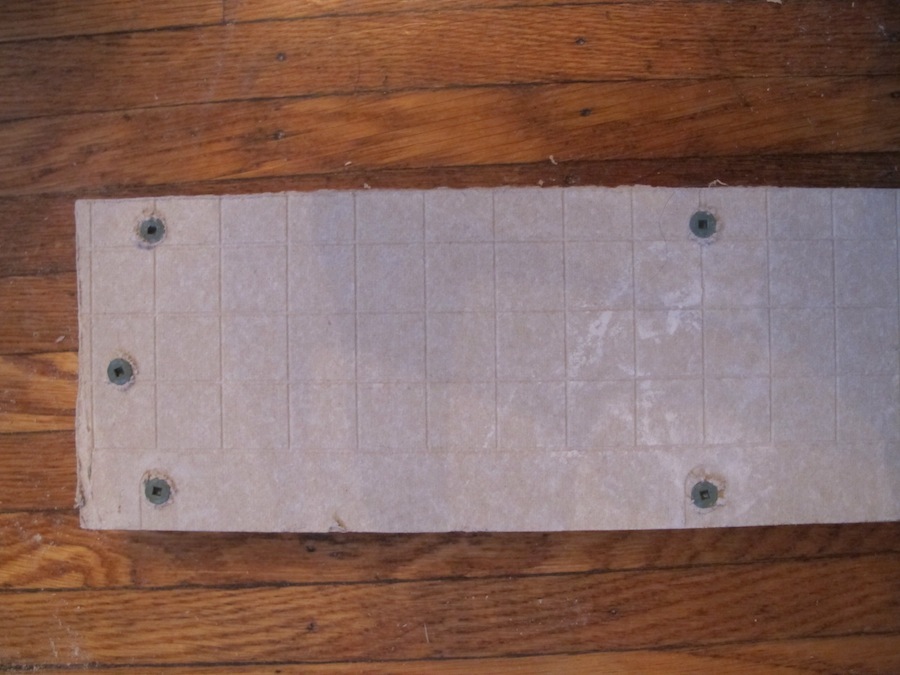
I forged ahead one evening a few days ago by starting to concept a plan with a scrap piece of HardiBacker. It’s about 24″x6″, I decided it’d be a good-sized project to serve as a functional wall decor piece-slash-jewelry hook.
Before I got too far in the process, I decided to mount the 24″ x 6″ scrap onto a thin frame so that I could attach that wooden frame to the wall easily with hooks, and lessen the risk of the thin HardiBacker warping and bending beneath the weight of the tiles. Because it was free, I used wood scraps; scrap shiplap, to be exact. We’re such lumber hoarders that even a bunch of 3″ chunks for each end was available for my choosing. A piece of furring strip for $2 at the store would have done the same thing.
The pieces of wood that I salvaged aren’t attached to one another, but the board itself was affixed strongly with leftover HardiBacker screws that I also had on hand (free, but maybe $7 at the store). The frame did just what I hoped, and stiffened and anchored the HardiBacker board, much in the same way that wall studs do when you’re attaching the board to the wall.
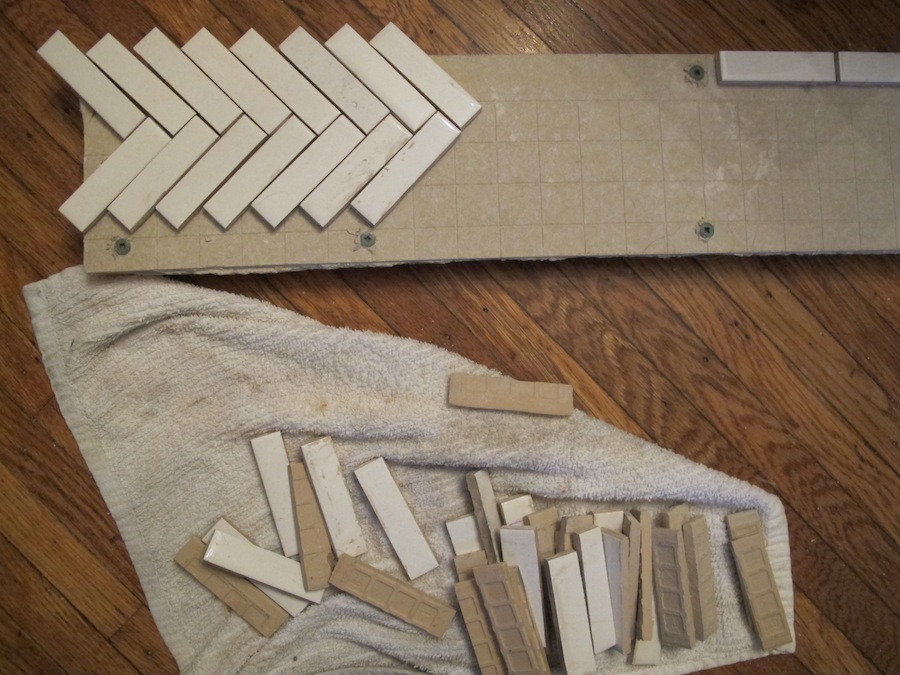
With a solid base set, I messed around with the scrap tile pieces until I decided on a rough layout for the herringbone, mostly working to determine the best way to use the tiles most resourcefully (I didn’t want to be cutting into any of our unused whole tiles – we do still have part of a box, but I’d like to return them to the store in exchange for cold hard cash).
Deciding that I could easily do a herringbone pattern, I cut the scrap pieces of tile with the wet saw into pieces that were 3/4″ in width x the original tile’s 3″ length (which took all of 30-minutes) and then began dryfitting them on to the frame.
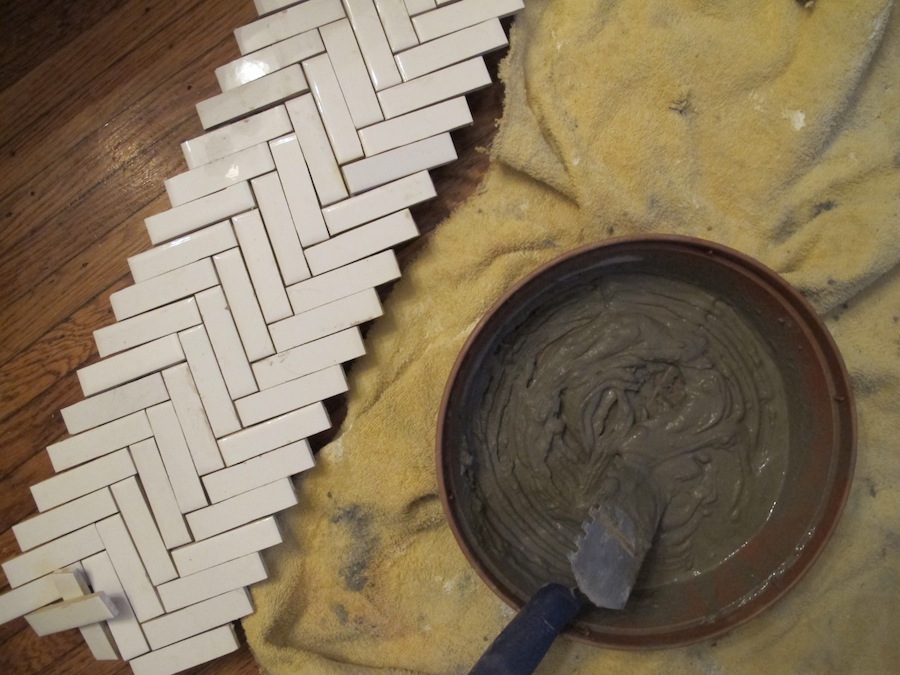
It was looking good, and I was getting excited at the idea of this piece coming together more easily than I imagined, so onward it was with mortar (also leftover from the bathroom, no extra money!). The polymer fortified thin-set we used is ideal for attaching tile to cement board, holding its own really strongly, but if you were to instead build this design onto a piece of wood (also totally possible) it’d probably be best to use simple mastic adhesive. The leftover mortar we had was not pre-mixed, so I added a little to the bottom of a scrap container I had laying around and so-so-slowly added water until it reached a thick consistency (like peanut butter).
I worked a little more quickly and a little less cautiously than I did with the shower tile, omitting planned spaces and just wedging the pieces side-by-side from one end of the board to the other. That thin-set sets q-u-i-c-k.
I left the mortar alone to dry overnight, not touching the piece again until the next evening when I cleaned off all remnants of oozing thin-set and polished up each tile.
Next up was the grout; I actually popped open the bag of dry powder that we had yet to start using in the bathroom for this (it was there, and I didn’t think the shower surround would require us to use the full bag), and mixed a little bit with water in a mixing bowl.
 I wasn’t sure if this grout was going to adhere well in the cracks, because the spaces were very small and the grout we bought for the other project was sanded (the spacers we used were 1/8″ and sanded is generally recommended when you tile that far apart). Without worrying about it too much, I used a grout float to wedge the grout where it needed to be, and scraped off any excess.

Luckily, it worked – maybe not well enough for if you were going to be installing it in your shower, or in an area that was going to be walked on, or leaned against all day long, but for the purposes of creating a decorative jewelry rack, the sanded grout did just fine.

After 30 minutes, I wiped the surface clean and lightly scrubbed over every grout line with a damp rag to remove any excess, and let it dry for another 24-hours.
I intended all along that it would be hung horizontally, so I bought a bunch of new zinc-plated screw hooks to install on its wooden frame. I purposely bought ones with a very long neck…
…It wasn’t until after the grout dried that I noticed that I had laid the tile at a serious slant on the HardiBacker. Whoops. I’m not perfect, that you know, but it wasn’t detrimental to the project. Make it work, make it work.

All that this meant was that the panel would have to be hung at a slant (no big deal, I was going to use a wire on some D-rings, so it could wiggle a little bit on that), and that the screws that attached to the base would have to be installed at varied lengths to look like they were evenly installed. You can see it in this picture, the ones closest to me are only installed about 1/3″ (still secure though), whereas the screw hooks at the other end are about 1-1/4″ into the board.
Also visible in this shot, those little white blobs along the wood? The screws I used were about 1/8″ too long and jutted out the back of the frame (whomp-whomp, seriously, I’m imperfect) so I cushioned the sharp nail tips with a product growing in popularity (as in, I saw it in House Beautiful!): Sugru. Always to the rescue, the putty molded right to the screw tips and dried, locking in place (and now I don’t have to worry about the tips digging into the walls).
Hung above my dresser in the bedroom, it’s charming. It’s resourceful. It’s keepin’ my tangles at bay, and giving me something prettier to look at than a bunch of empty picture frames (yes, that’s all that I had been storing up there).
With 11 hooks, it can manage most of my favorite necklaces (not all are shown, just the ones I successfully unsnarled).
Because 95% of this project was made with non-returnable scrap materials, the hooks were the only expense (total of $5.88 for 6 bags of 2). And really, if you don’t factor in the cost of HardiBacker and just use mastic and a piece of scrap plywood (seemingly more readily accessible), the entire tile usage equated to just 8.5 subway tiles (or $1.96 if you’re able to find the same 23-cent tiles at Home Depot). Go try it. Less than $10.


5 Comments
L.O.V.E. it!! Nice work!
Thanks Mindy!
Very pretty. Good idea. Well executed.
Emily, this is so cool. Like, seriously. I think you should make a few more of them and sell me one. I’ll pay! Name the price. ;)
Oooh, product extension. Good idea. I’ll need a packaging and distribution specialist to make that happen. Glad you like it!