• Home
  • about emily
  • before + after
  • HGTV + DIY Network
  • good press
  • contact
  • Let’s Organize These Posts:

    • Art Attack
    • Backyard
    • Barn
    • Basement
    • Bathroom
    • Beach
    • Bedrooms
    • Being Thrifty
    • Business-y
    • Buying and Renting and Selling
    • Casual Celebrations
    • Closets
    • Curb Appeal
    • Dainty Details
    • Deck
    • Decor
    • Dining Room
    • DIY
    • Dog-Related
    • Entryway
    • Flooring
    • For the Kids
    • Garage
    • Gardening
    • Helping The Economy
    • HGTV + DIY Network Projects
    • Holiday-Related Projects
    • Home Safety
    • Kitchen
    • Lighting
    • Living Room
    • Merry Travels
    • Office Space
    • Organized
    • Other Pads
    • Outdoor Living
    • Scooter Fun
    • Stairwell
    • Sunroom
    • Supporting Sponsors
    • The Art Room
    • Tools
    • Uncategorizable
    • Wedding
    • Windows
    • Work-pads
  • Search

  • Hi, I’m Emily

    Emily Fazio

    I'm a home improvement enthusiast, living a very merry DIY lifestyle.

    You can find me writing for Home Living Handbook, HGTV.com, and a handful of other websites. Follow me on facebook and instagram, or drop me a note if you'd like. I love notes.

    Thanks for visiting!

  • BROWSE POSTS BY CATEGORY:

    • Art Attack (7)
    • Backyard (92)
    • Barn (8)
    • Basement (27)
    • Bathroom (43)
    • Beach (13)
    • Bedrooms (73)
    • Being Thrifty (53)
    • Business-y (12)
    • Buying and Renting and Selling (23)
    • Casual Celebrations (36)
    • Closets (17)
    • Curb Appeal (44)
    • Dainty Details (8)
    • Deck (23)
    • Decor (286)
    • Dining Room (37)
    • DIY (578)
    • Dog-Related (24)
    • Entryway (59)
    • Flooring (58)
    • For the Kids (32)
    • Garage (17)
    • Gardening (70)
    • Helping The Economy (30)
    • HGTV + DIY Network Projects (283)
    • Holiday-Related Projects (80)
    • Home Safety (12)
    • Kitchen (87)
    • Lighting (31)
    • Living Room (77)
    • Merry Travels (21)
    • Office Space (21)
    • Organized (41)
    • Other Pads (14)
    • Outdoor Living (12)
    • Scooter Fun (8)
    • Stairwell (20)
    • Sunroom (22)
    • Supporting Sponsors (43)
    • The Art Room (3)
    • Tools (43)
    • Uncategorizable (1)
    • Wedding (28)
    • Windows (14)
    • Work-pads (10)
  • Search

  • Pages

    • blog
    • Good Press: Special Features, Freelance Projects, and Long-Term Clients
    • Privacy Policy
    • about emily
    • before + after
      • before + after – transforming my first home
      • before + after, our current home
    • contact me
    • choose a badge and share the merrypad.com love
merrypad website logo with acorn and text
  • Home
  • about emily
  • before + after
  • HGTV + DIY Network
  • good press
  • contact

The Deck Is Finally DONE

December 15, 2010

It may have been a rainy/snowy morning, but 35 degrees is downright warm after a few sub-15-degree mornings, so with hats and jackets on, we made a plan to build the second pergola and finish the deck completely (the deck itself only took 3 weeks in June, but somehow the pergolas dragged on and on and on). Needless to say, the coffee was hot (and sawdust-free thanks to the saw case), the motivation was high, and we were racing against an approaching storm.

Warm, sheltered coffee house.

Similarly as with the first pergola, the materials we bought were simple, and purchased pre-cut as closely to length as possible. The 4×4’s were 8-footers, the girders, 8-foot 2×6’s, and the smaller beams at the top, just 10-foot 2×4’s. Minimal trimming was necessary, and I only had one extra board at the end (a 2×4, which I did diligently return for $3.97). What other materials and tools did we use?

  • Measuring tape
  • Electric circular saw
  • Electric and battery-operated drills (yes, we usually use both. Two going at once gets things done faster)
  • 3/8″ galvanized carriage bolts, washers, lock, and hex nuts
  • 1/2″ drill bit for the 3/8″ bolts, and something slightly smaller too.
  • Square edges (yes, two)
  • Deck screws (2.5″ and 2″)
  • Level

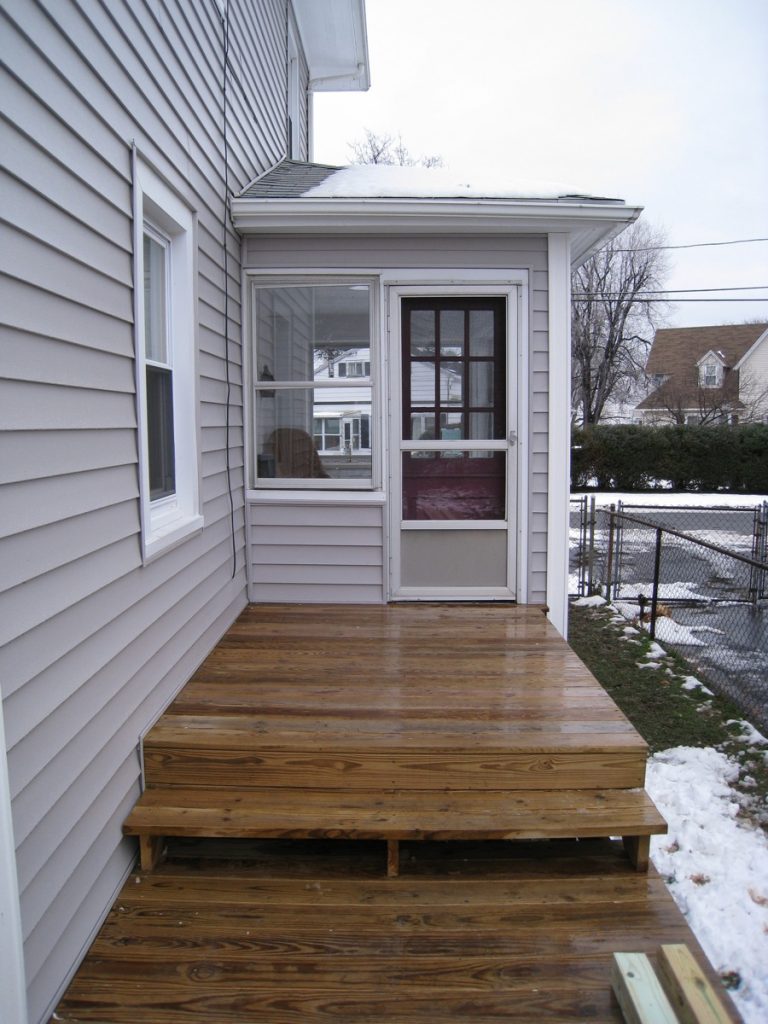
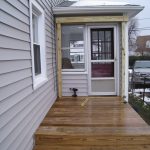
Here's the area the new pergola was being installed. That's the sunroom (note how close the door is to the edge of the deck).

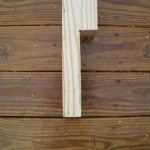
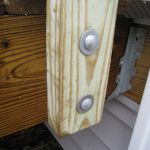
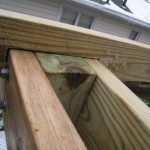
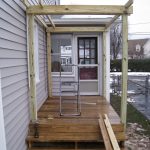
The posts ended up being the most complicated part of of this project, because we needed to make sure that the posts at the deck edge were positioned in such a way that the storm door to the sunroom wouldn’t be blocked (and the edge of the deck had to be very close to the doorway to be to code with the property line). Pete had the idea to notch the posts out, and actually create a more supportive structure by letting them wrap around the side of the deck (carriage bolted in place). Like with the first pergola, we built the structure in two pieces – once the overhanging posts were notched, the girders could be measured and bolted to the tops of the post. Lots of measuring ensued, but we didn’t make any mis-cuts or mis-drills, and it’s totally level, so I consider that a win (double-win, because that means the entire deck we built was level, pat-on-back).

  • Notched end of the post. This end overhangs the side of the deck and was bolted securely in place.
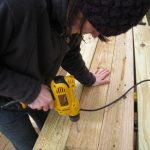
  • Me, drilling holes in the posts for carriage bolts.
  • Cleanly bolted on corner post. (Can't wait for the pergola wood to match the deck boards :) )

Pete had the process for doing the top beams down-pat after troubleshooting through the first pergola. The basic idea was to create a template on one board, and duplicate those measurements to the other boards (there were 9 boards total for this structure). The beams are notched to lock right in place (and were screwed in above for support). To ensure even spacing, I took some measurements and divided the space out to match the first pergola – about 10-1/4″ between each board. We cut a piece of wood that was 10-1/4″ to use as a spacer for even more accuracy. While Pete did the meticulous cutting, I worked to replicate the template on all other boards, and measure out and position each board onto the girders.

  • View from the top of the girder - see how the smaller 2x4 is cut to wrap around the post?
  • Screwing the top boards in place.

The final finishing touch involved installing those handrails – the higher areas on the deck required some sort of railing to meet code, and I had wanted to try something a little less conventional (my inspiration was Peter Kirch-Korff)

Finally! Because I took lots of photos during this project, check out the raising of the pergola right here. Enjoy!

  • Going up. (Fits comfortably under the overhang.)
  • Second set of posts and girders... up!
  • Posts being trimmed and placed on top!
  • Second pergola... almost done!
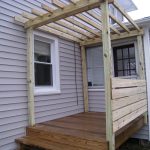
  • Finalized with a clean-lined railing. NOW done.
  • Side view of pergola #2.

New view from the backyard. (I can't wait to get some hanging baskets in the spring!)

Share

Backyard  / Deck  / DIY

Emily
I'm a home improvement enthusiast living a very merry, DIY-filled lifestyle. As a freelance writer, you can find my work on many popular home and garden sites, including HGTV.com, HomeLivingHandbook.com, and other outlets. Follow me on social, or drop me a note.

4 Comments


Pete
April 29, 2011 at 10:02 am
Reply

I think there’s an invention there. The coffee cup encaser.


    Emily
    April 29, 2011 at 10:11 am

    Agreed. Let’s get on that.

Shannon
April 23, 2020 at 9:55 pm
Reply

How did you notch the posts and what kind of saw was used for it? I’m replacing the posts on my deck, trying to use the same process, but I am having problems cutting them. Any help would be appreciated.


    Emily
    April 24, 2020 at 8:49 am

    Hi Shannon, It’s hard to recall now, but I believe it was a combination of a circular saw and perhaps a sawzall to get into the grooves. A hand held chisel would also be helpful at cleaning up rough cuts.

Leave a Reply Cancel reply

Your email address will not be published. Required fields are marked *

This site uses Akismet to reduce spam. Learn how your comment data is processed.

  • HI, I’m Emily

    Emily Fazio

    I'm a home improvement enthusiast, living a very merry DIY lifestyle. Follow me on facebook and instagram, or drop me a note if you'd like. I love notes.

    You can find me writing for Home Living Handbook, HGTV.com, and a handful of other websites.

    Thanks for visiting!

  • Instagram

    merrypad

    I’ll always say yes to a maker space experience, I’ll always say yes to a maker space experience, and The Shed at @timberland’s HQ did not disappoint ✌️🥾 @homelivinghandbook 

Final footwear design not shown 🙂

PS tagging some cute shoes they gifted from the Fall 2024 collection!
    I made the call and snapped off the elephant garli I made the call and snapped off the elephant garlic scapes yesterday evening. Who’s going to help us harvest and eat the next 1,000? 🧄🧄🧄🧄
    Hi! Boy, do I have things to share. 🎉 🫶 Fr Hi! Boy, do I have things to share. 🎉 

🫶 Friendly reminder to focus on balance and wellness: Pete and I lived abroad with our family for the entire month of August 2023. If you ever have the opportunity to work remotely, I promise it to be a worthwhile adventure that’ll change your POV in so many ways. And, If you need an in with an incredible AirBnB in Denmark, DM me. From new playgrounds and museums to the culture and design, making this trip a reality continues to be something we celebrate every day, and I wish everyone can experience it on some level.

💻 Friendly reminder to say yes to new (overwhelming) opportunities: The professional celebration happened upon our return. Last fall, I was approached to launch @homelivinghandbook, a new Pursuit channel for @mensjournal that highlights home improvement and DIY! It has been really fun to see it come to light, and truly one of the most exciting partnerships I’ve ever had. Timing couldn’t have been better, and I’m really happy to see how it grows over time. Please follow along — the team published 150 articles in two months, covering all kinds topics for home enthusiasts! So much more to come. #linkinbio #homelivinghandbook

✌️ the end, many thanks for your support!
    How much garlic is too much garlic? Maybe we’ll How much garlic is too much garlic? Maybe we’ll find out in 2024. Finished planting 1,005 cloves (and 19 shallots) in three new beds at the farm, and crossed one huge chore off my list 📝 #gardennotes #garden2024
    Instagram post 18003690670970980 Instagram post 18003690670970980
    We grew these fools. We grew these fools.
    pumpkin patch is doing great✌️#year1 #squashbl pumpkin patch is doing great✌️#year1 #squashblossoms #pumpkinpatch
    follow emily: @merrypad


  • Like Us On Facebook

    Facebook Pagelike Widget


  • Popular Posts

    • How to Dye Pasta Different Colors (Halloween Recipe) 85 views
    • Designing a Durable Wooden Fence For Our Beautiful Backyard Garden 25 views
    • How to Make Your Own Barn Quilt 21 views
    • The Easy Way to Hang Art on Brick or Stone 20 views
    • Building a Flagstone Patio in One Day 17 views
    • Create a Unique Spider Web Pumpkin 15 views
    • Less Is More: How to Remove a Fireplace Surround 15 views
    • The Farmhouse Wedding Table Smackdown 14 views
    • How to Build New Front Stairs and Railings 14 views
    • Retiring NuTone, Replacing with Atomic 14 views


  • BROWSE POSTS BY CATEGORY:

    • Art Attack (7)
    • Backyard (92)
    • Barn (8)
    • Basement (27)
    • Bathroom (43)
    • Beach (13)
    • Bedrooms (73)
    • Being Thrifty (53)
    • Business-y (12)
    • Buying and Renting and Selling (23)
    • Casual Celebrations (36)
    • Closets (17)
    • Curb Appeal (44)
    • Dainty Details (8)
    • Deck (23)
    • Decor (286)
    • Dining Room (37)
    • DIY (578)
    • Dog-Related (24)
    • Entryway (59)
    • Flooring (58)
    • For the Kids (32)
    • Garage (17)
    • Gardening (70)
    • Helping The Economy (30)
    • HGTV + DIY Network Projects (283)
    • Holiday-Related Projects (80)
    • Home Safety (12)
    • Kitchen (87)
    • Lighting (31)
    • Living Room (77)
    • Merry Travels (21)
    • Office Space (21)
    • Organized (41)
    • Other Pads (14)
    • Outdoor Living (12)
    • Scooter Fun (8)
    • Stairwell (20)
    • Sunroom (22)
    • Supporting Sponsors (43)
    • The Art Room (3)
    • Tools (43)
    • Uncategorizable (1)
    • Wedding (28)
    • Windows (14)
    • Work-pads (10)


  • a little bit of everything, friends, DIY, and inspiration

    • Dadand.com < My husband and his BFF
    • HGTV
    • Home Living Handbook, a Pursuit Channel for Men's Journal
  • Some Legal

    Merrypad incorporates the occasional affiliate link to Amazon.com and Minted; we link to many other websites and products, but if it is in context of a paid sponsorship, it is always noted as such. Please review the privacy policy and contact me if you have any additional questions.

    Theme customized by Pete Fazio Creative, the guy from dadand.com.


© Copyright Merrypad